How To: Linocut & Print
What is lino-cutting or -printing?
In layman terms, linocut and print is similar to rubber stamp carving. In printmaking terms, it is a form of relief print, originating from wood carving. Linoleum was originally created by Englishman Frederick Walton as a form of flooring circa 1860s (e.g. kitchen or gym flooring), but artists soon realise it made for a more affordable and simpler carving medium than wood (expensive, grain patterns). Famous artists that dabbled in linocut include Pablo Picasso, Sybil Andrews and, in modern times, Maarit Hänninen and Davide Schileo, to name a few.
To create a linocut pattern means to create a raised surface a.k.a positive by removing the negative space. The latter is a process of reduction. An example is How To Ink’s company stamp or, as I call it, the seal of approval for documents requiring formal verification.

Our company stamp along side with previous studio address
You can check out more detailed posts on linocutting, its history and examples at:
The History of Lino Printing and its Artists by Boarding All Rows
POP MEMBER SHOWCASE: 13 LINOCUT ARTISTS by People of Print
Celebrating Britain’s vibrant history of linocut printing by Creative Review (UK)
Which linoleum do I use, and how do I get started?
Linoleum takes its name from its main material - linseed oil. Specifically, solidified linseed oil (linoxyn). Its use as flooring has since been superseded by other harder options, and is now commonly purchased by artists interested in linocut and print.
A variety of linoleum exists in the market for fine art use, ranging from hard to soft (akin to rubber). The difference is the amount of solids within it, which can include pine resin, ground cork dust, sawdust, and mineral fillers such as calcium carbonate; the more there is, the harder it will be.
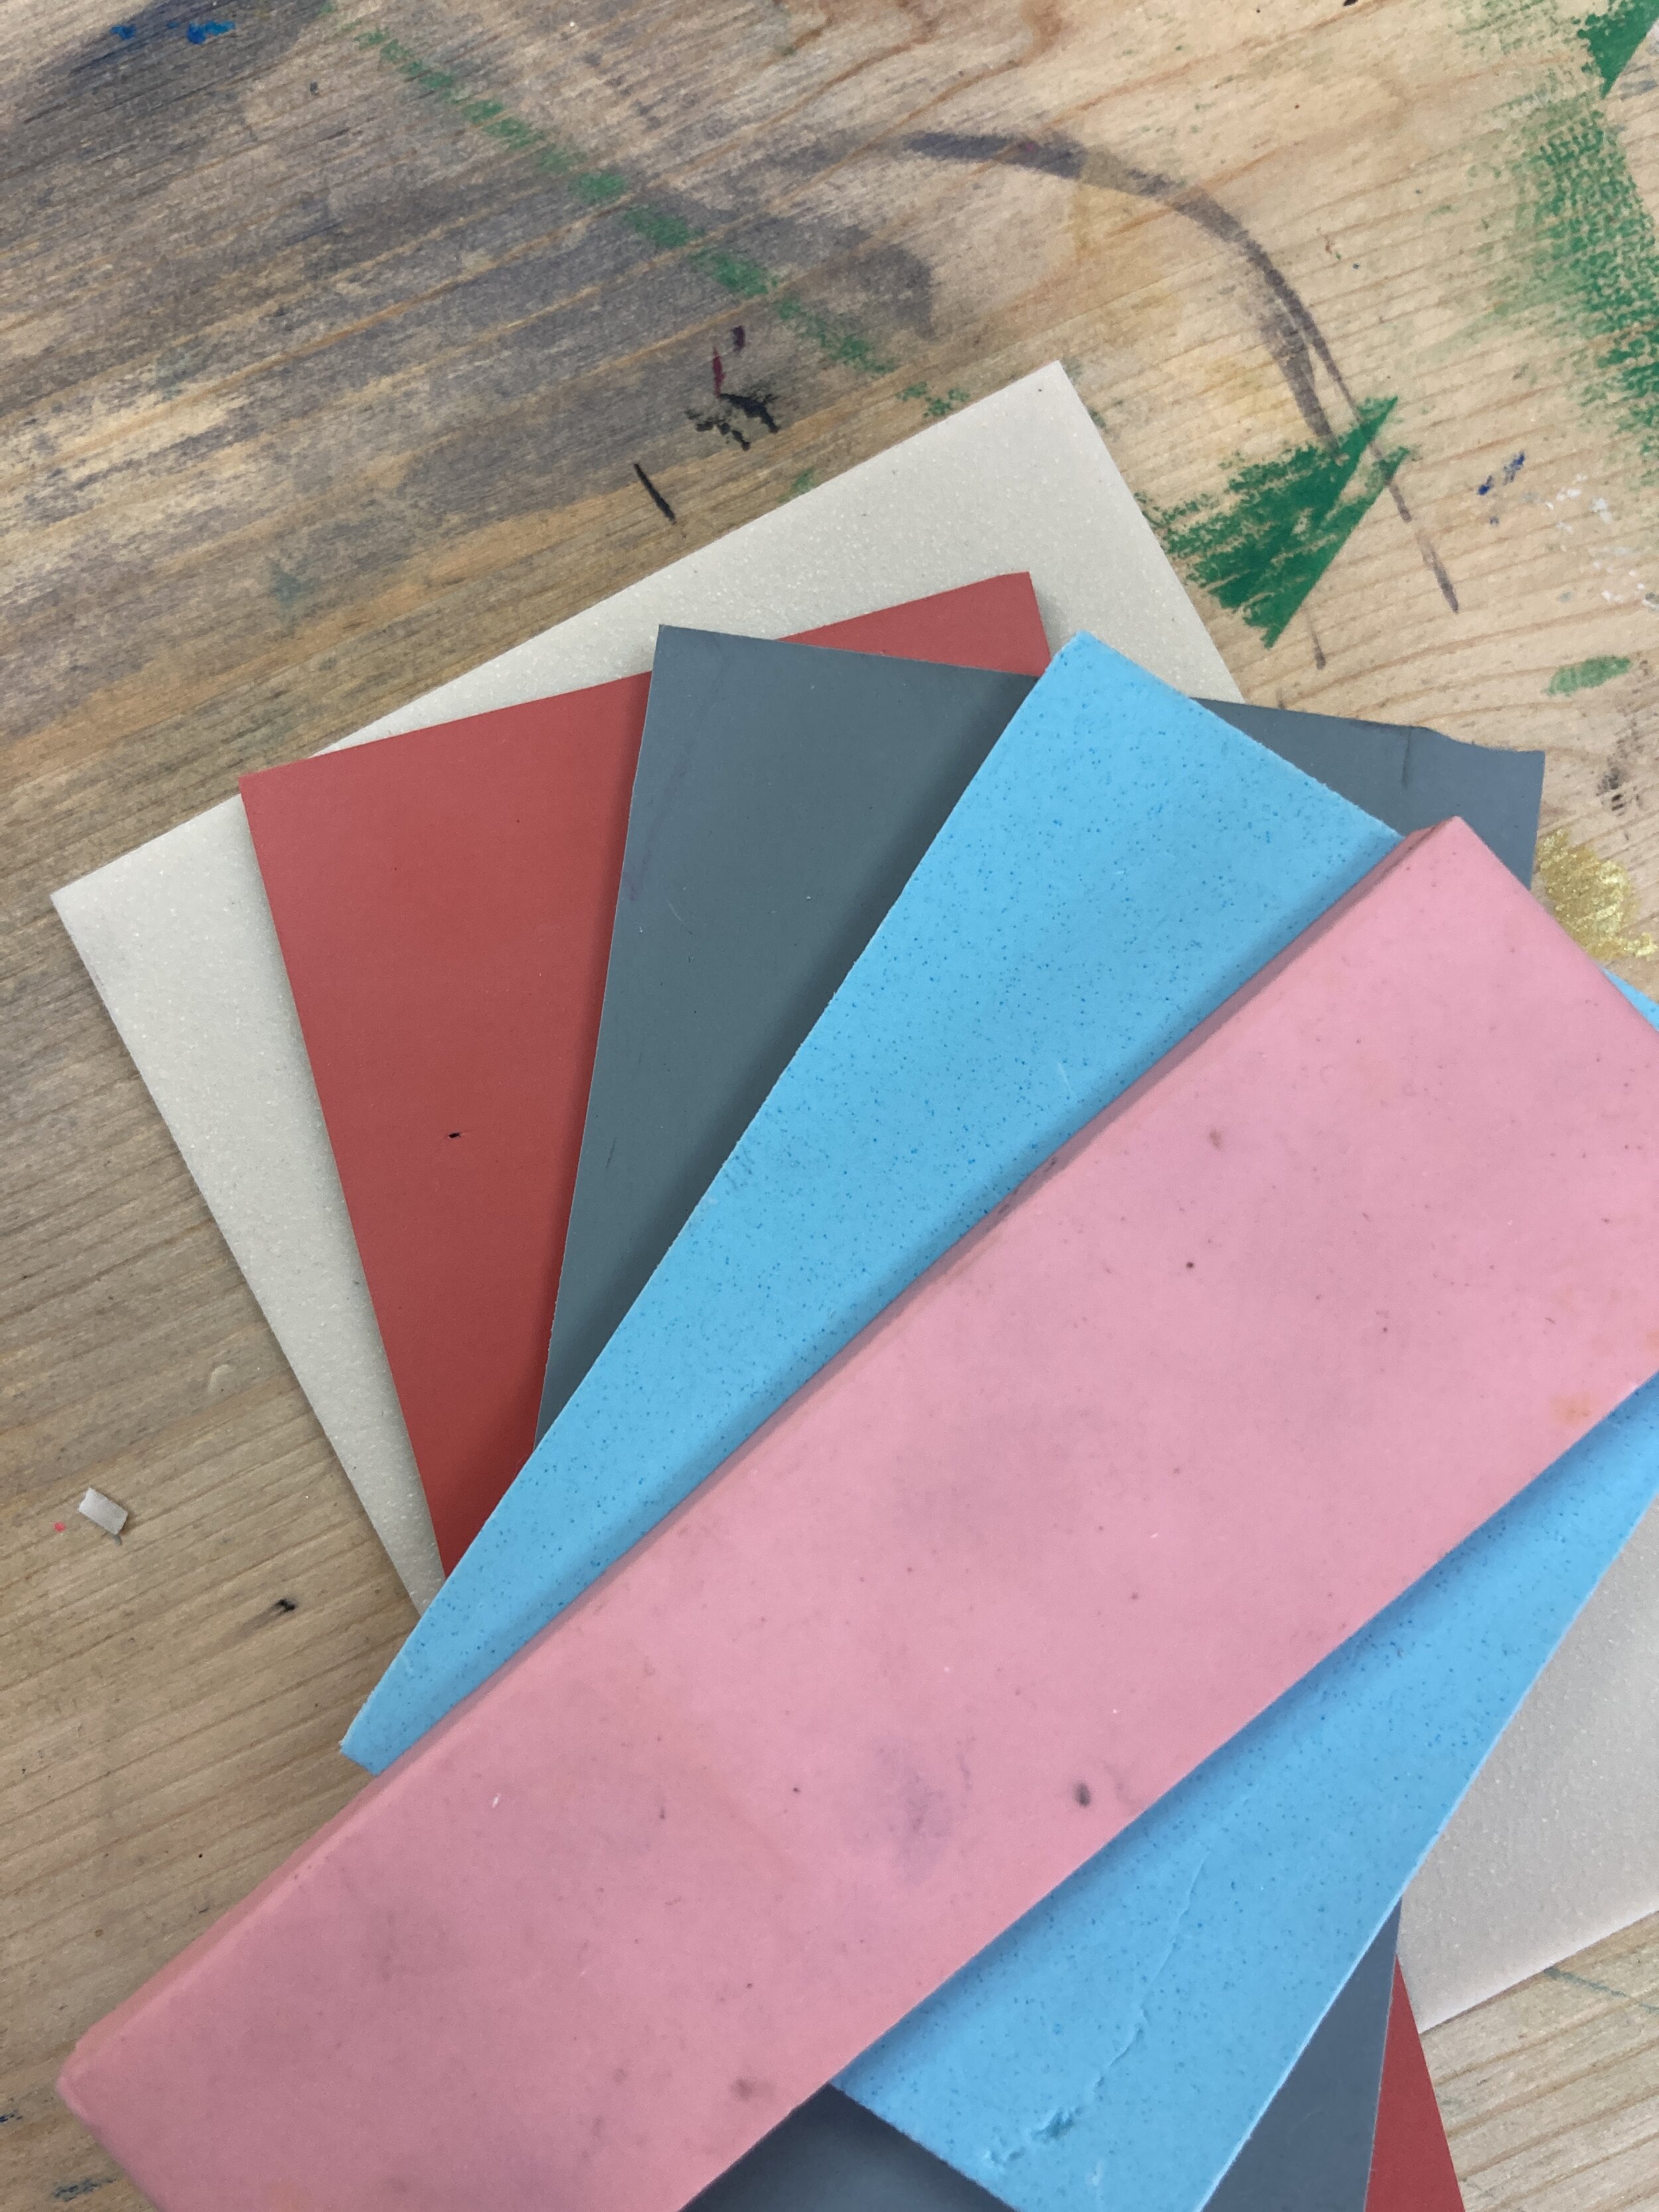
Left to right: Pink & Blue Speedy-carve, Grey NCD, Japanese Vinyl & Beige Softcut.
Determining which linoleum to use ultimately depends on the artwork, taking into consideration the level of details. Soft linoleum is often used for simple shapes and thicker lines, while fine details require a harder linoleum. The reason is due to how much compression the linoleum goes through during the printing (Via contact pressure) process. E.g. The softer linoleum will compress more, with a higher chance to spread out the relief ink. The medium you’d want to print on further determines which linoleum to use, with softer linoleum being recommended for when printing on fabric. Speedball’s Speedy Carve has had the best results on T-shirts!
The type of linoleum will also determine the transfer process onto the linoleum. Confident artists tend to draw directly on the linoleum itself, while reversing the image in their heads. I am neither an artist nor am I able to draw so confidently, which is why I depend on other transfer methods with a printed image in reverse (mirror image). Popular methods include graphite transfer/carbon paper (in our basic course) and laser printer transfer (advanced/full course), as well as ironing for the Speedy Carve.
The next components are your ink and paper. There are a few considerations here, depending on how you envision the finish of your print to be. Handmade or textured paper vs smooth paper, water-based inks vs oil-based inks, layers of colours vs, split fountain. Each factor affects and give your print that unique finish, and it is, honestly, all about experimenting the different combinations.
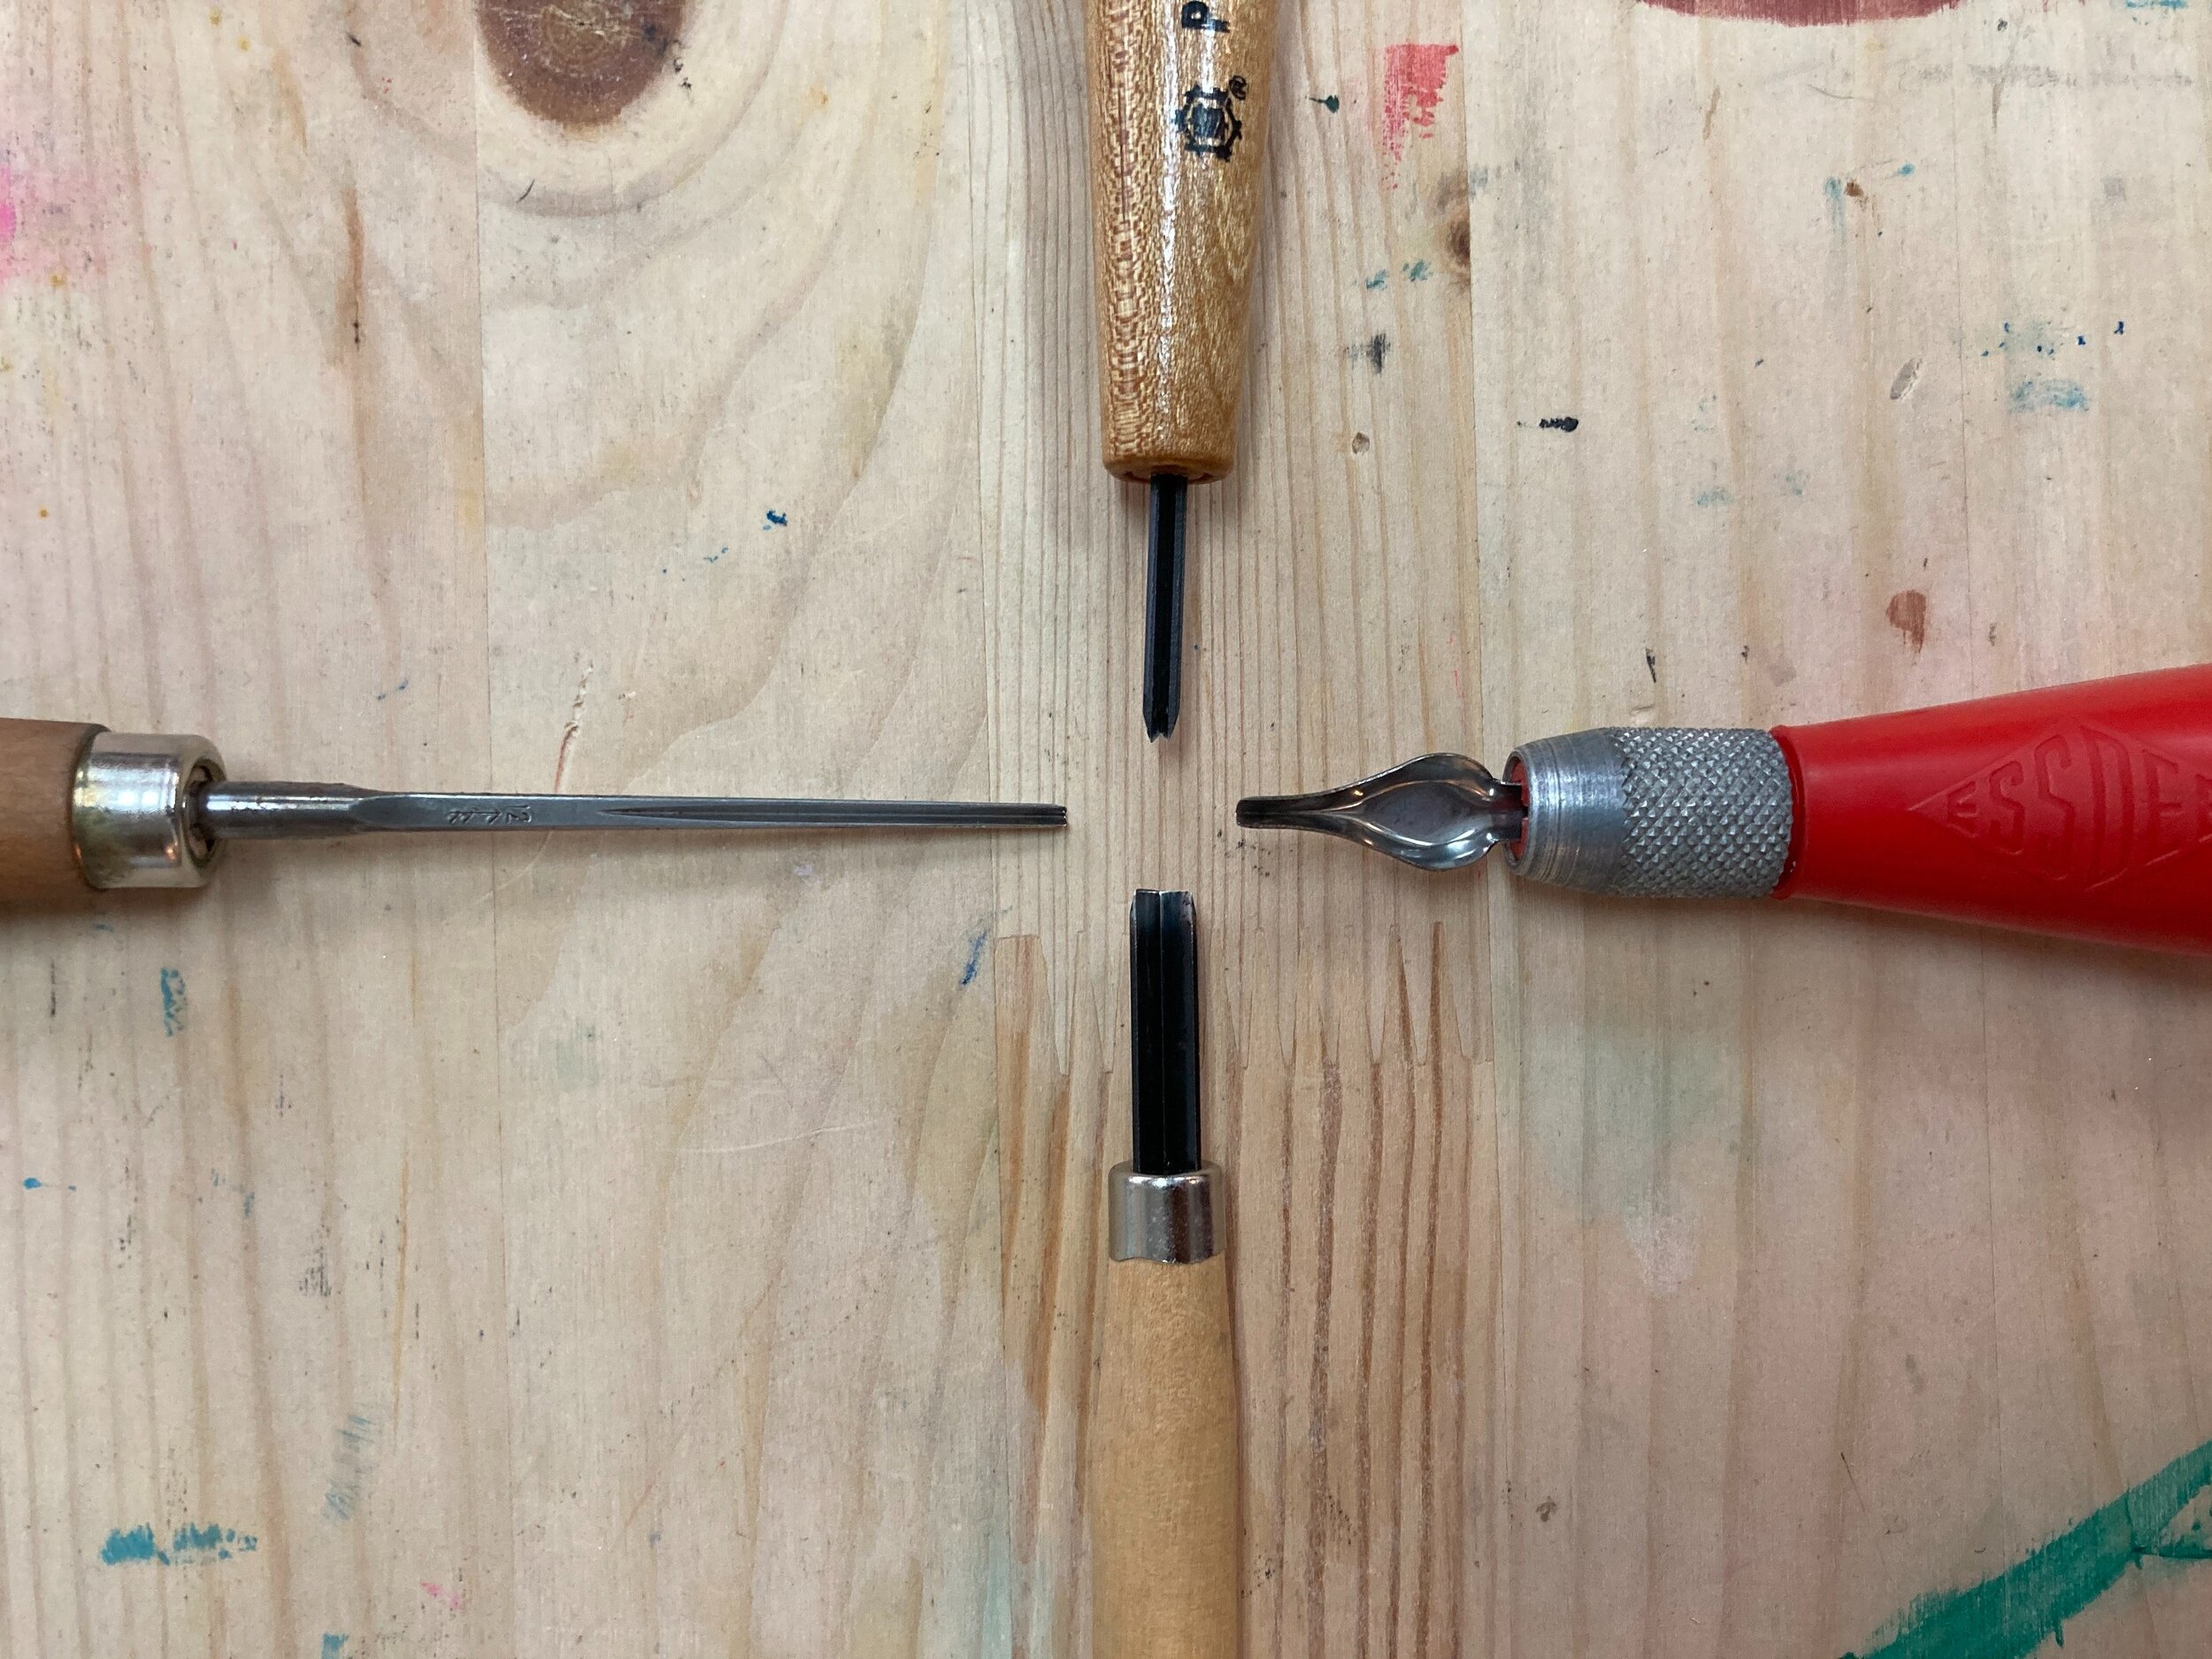
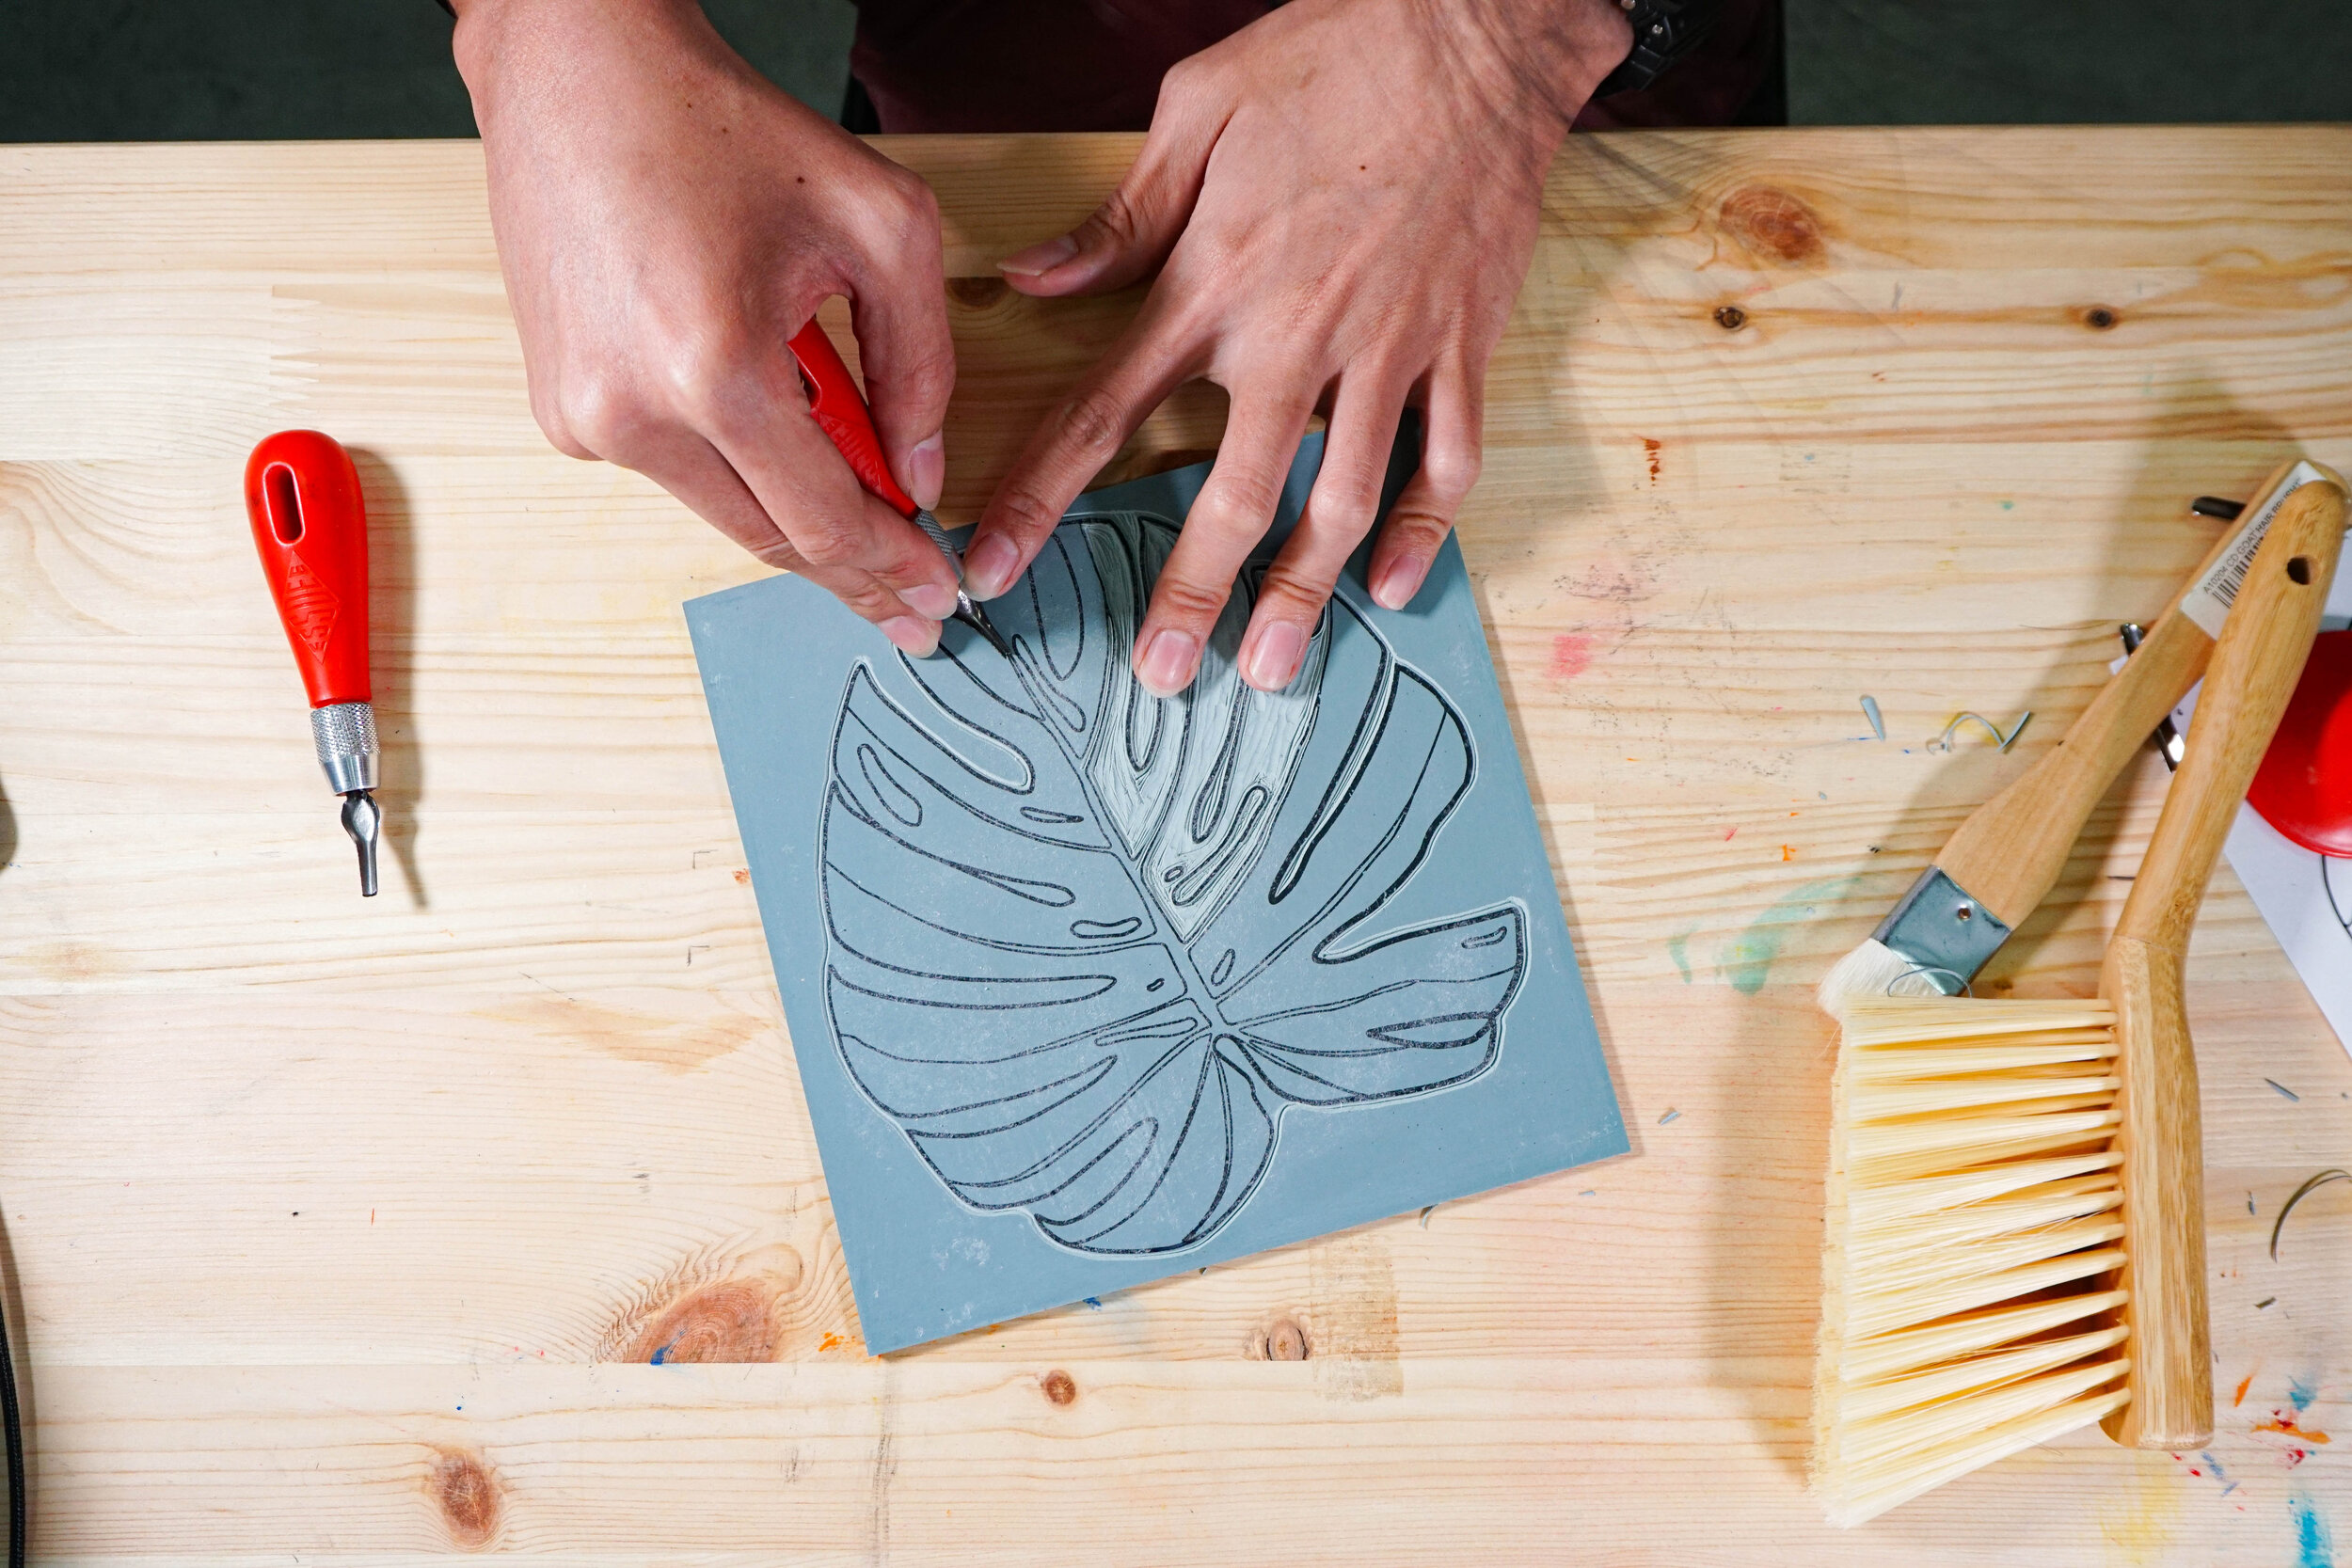
Once you’ve settled all the nitty gritty bits, with your linoleum primed, it’s time for the best part - carving. Linocutters come in various forms with different sizes of V- or U-shaped chisel nibs, which you will use to carve out as accurate as possible to the original image. With years of experience under my belt, a 100% copy all the time is still a challenge.
But that’s actually part of its beauty. In the process, there would be changes or implementations to the design we like to call happy accidents (like an enthusiastic slip of your linocutter) or simply realising portions that are hard or not possible to carve with your equipment. Part of the carving process is adjusting the linoleum pattern along the way, creating another uniquely yours print at the end of the day.


My views on this technique
To start off, I’ll need to say that I’m not printmaking trained. I majored in graphic design and got into printmaking as I liked having options when translating my digital design into prints (other than digitally printing it).
There are many, many printmakers with amazing works and are able to carve a perfect copy of the image they drew digitally or drawn directly onto the linoleum. One of them being Picasso and his method of reduction (carving and printing multiple layers by carving on the same linoleum piece). I feel inspired when I see them at work, and aspire to reach that level as a fellow craftsman and printmaker. It has become a rather addictive challenge to myself, whenever I see a fellow artist challenge something new or produce another masterpiece.
For me, linocutting is not just about how beautiful the design or illustration is, but my technique in carving and printing (registering of the ink on paper). Till today, I am still learning and experimenting on how could I improve on my techniques, striving to push my own expectations on achieving the “perfect” linocut and print, as well as the rest of the printmaking methods I have taught myself.
It’s always a new challenge whenever I start a new piece, irregardless how many I have done before.
The takeaway?
To me, linocutting is learning how to embrace mistakes. It is about being tolerant and accepting that not everything will go as plan. When faced with such, you can decide to solve it or leave it as it is and move on. This is the same principle I apply to my own life.
In all honesty, these “mistakes” often happen when I’m about 80-90% done with the carving. I would either slip my blade or lose focus, and this could easily destroy the original aesthetics of the print. It’s hard to accept, when I was so close to finishing the piece. And there is no undo button. But it is not always a dead end. There are ways to adjust the print to achieve a new aesthetic, or physically replace the portion of the linoleum. I am a bit of a perfectionist, which means this is quite a blow to me. Over the years, I learn to breathe in, muster the focus and patience and adjust the linoleum and see it as a new unique feature to the design.

One of the many mistakes, when printing text, make sure is mirrored before doing the transfer.
I personally believe honing skills in craft is all about practicing and dedication as well as having tons of fun in experimenting. Why else would you want to spend so much time on something you won’t be able to enjoy? It’s important to find the joy in what you’re doing, which sometimes require a little bit of a different perspective.
And, to me, it is a therapeutic activity. A view I realised many fellow participants do share, particularly during the carving process. It’s definitely a training in paying attention to details, being aware and focus.
I may have bored you with my lengthy piece, but I do hope you’d give linocut and print a try one day!